Posts

ESP8266 and ESP32 WiFi development boards - more power in Arduino Control Center

Image
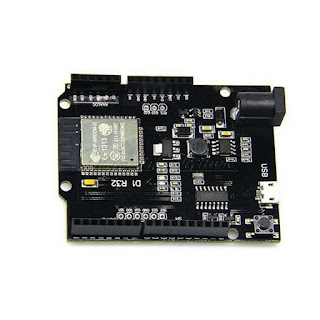
 Starting from version 4.0.0(October 2021), Arduino Control Center supports the ESP8266 WiFi development board.  Just a month later, more powerful ESP32 development boards are also supported in ACC. WiFi boards, like ESP8266 and ESP32, bring much-needed freedom in designing your Home Automation system, a Garden monitoring system, or any else system which has to be controlled, monitored and measured with all kinds of sensors without the need for extra network wirings. ESP8266 and ESP32 are not new types of development boards, Arduino IDE compatible, especially ESP8266. But they are built-in in millions of devices and proved their stability, low cost, and easy integration in many use-cases, from smart switches to robotics and wireless control. Adding ESP boards in ACC is maybe even easier than Arduino boards since the WiFi module is integrated into the chip, unlike Arduino boards where network module(shields) has to be connected separately. We have developed the program with various type

Arduino Sensors Kit by Seeed Studio

Image
  About 8 months ago, I've received, and write a review, about Grove Beginner Kit for Arduino. Recently I've received an Arduino Sensors Kit from the same company, Seeed Studio.  At first sight, there is not much difference between the two of them, but there are differences.  1. First, this kit is designed as a standard Arduino shield, which means that this piece of hardware comes without  Seeeduino Lotus(ATMega328p chip), with a bit greater price (23USD vs 20USD).  At first, you may think that is a bad deal, but it is not.  Any Arduino developer, either beginner or not, before diving into Arduino word, order for yourself many Arduino Uno boards, either original from the official Arduino store or from many online stores with dozen quality clones manufactured by many companies all around the world. Arduino Sensors Kit as shield gives you much more flexibility in order to test integrated sensors with Arduino Uno boards you already have in your stocks, and if something is not work

SeeedStudio Grove Beginner Kit for Arduino with Arduino Control Center

Image
Today I have received " SeeedStudio Grove Beginner Kit for Arduino ", a very nice piece of hardware for introducing new Arduino users into the Arduino programming world. Like any other serious hardware manufacturer, SeeedStudio has its own Arduino compatible libraries for supporting this Arduino kit. All documentation, libraries, and examples you can find on this link , including step-by-step instructions. But that won't be a subject of this topic. There is no need to explain something which is already very well documented. I will focus here on how this beginner-development kit can be programmed and visualized with Arduino Control Center. As soon as I connected Grove Beginner Kit for Arduino with included USB micro cable to my Windows PC, Seeeduino Lotus(ATMega328p chip), which is basically Arduino Uno - Nano compatible board, started to boot up and included demo in firmware start running. I didn't pay attention to this because I wanted to test the board with

Android REST SMS Gateway and Arduino Control Center

Image
It sounds awkward? In short, REST SMS Gateway allows changing your phone into a powerful SMS Gateway which you can control from the Arduino Control Center desktop application for sending alarm SMS messages. For testing purposes, I've installed on my smartphone an Android application called very intuitively - REST SMS Gateway :). I got this app from my friend, but you can download it from Android APK(install packages) download sites. This, and many other applications with similar purposes, are not available on the Google Play store anymore due to the Google Play Developer Policy which restricts SMS , CALL_LOG access only to default phone applications. After downloading and installing the APK Android package for the  REST SMS Gateway application, you will get this window: NOTICE: your phone MUST be connected in LAN (local, home network over wireless connection!!!) Otherwise, this will not work. After pressing the Start button, the window below will show up. But, the app

FAQ - frequently asked questions

Image
- What do I need in order to start programming Arduino boards(Nano, Uno, Mega) with Arduino Control Center, except Arduino boards? Do I need a license for the program? To start, you don't need a license. You can use the demo version until you get familiar with software logic and your project requirements. The project created in the demo version will be fully functional in the registered version. - What is the easiest way for the first time to start with Arduino board configuration? The easiest way for the first time is to upload firmware without support for ethernet shields(their names begin with MEGA_SERIAL_ONLY, UNO_NANO_SERIAL_ONLY) in order to get familiar with Arduino Control Center programming logic. Later on, you can attach ethernet shields, Update firmware for that type of shield, and set up parameters for connection to the network. - I am using Windows OS, the Arduino board is connected over USB to the PC. How can I communicate in Arduino Control Center with a conne

Google Chrome Lite mode and Arduino Control Center

Image
Google Chrome Lite mode is a way to speed up HTTP sites on slow connections. This mode is now only available on Chrome for Android. Important note is that Arduino Control Center web interface http pages NOT WORKING in this mode! HTTPS pages will load normally, since this traffic is not redirected to google servers. In order to enable Arduino Control Center web interface http traffic, there is a couple workarounds: 1. Turn off Lite mode on your Android phone. 2. Open Arduino Control Center web page in incognito mode Or, use https Arduino Control Center web pages only.

Secure way to control Arduino devices from anywhere in Arduino Control Center(Part IV)

Image
In previous posts, we have created  mytestdns.redirectme.net   domain name, and you are able to login to Arduino Control Center HTTP server(a   not secure connection,   please read all previous posts). Now, go to SSL For FREE web site, type your domain name(in this case mytestdns.redirectme.net, you type your domain name) and start creating SSL certificates for the secure HTTPS connection. Type domain name Next step is validate certificates manually: Manual verification Download verification files into already existed folder - web\.well-known\acme-challenge . Downloaded verification file Downloaded file in folder Verify downloaded file: Download certificates: Download SSL certificates Unpack downloaded file with certificates Copy unpacked certificates into "cert" folder Load certificate.crt into Arduino Control Center web server Load private.key into Arduino Control Center web server